Thursday, September 29, 2011

Onion Jam

Ingredients:
  • 6 large red onions thinly sliced
  • 4 cloves garlic, chopped
  • 3 tablespoons brown sugar
  • Smoked Paprika (according to taste)
  • 1 cup coffee (fresh brewed drip coffee)
  • 1/2 cup currants (you can use raisins too, but I prefer currants)
  • 1/4 cup apple cider vinegar
  • 1/4 cup maple syrup
  • Black pepper to taste
  • Salt to taste
  • extra water
Directions:
In a heavy bottomed pan:

1. Fry the onion until lightly browned (you could do this in batches too)
2. Add garlic and continue and cook for a few more minutes on medium heat

After ~5 minutes of cooking

3. Add the rest of the ingredients except for the water. Simmer for 2 hours adding 1/4 of a cup of water every 25-30 minutes or so and stirring.
4. To store:
  • Once cool, store in the refrigerator in an airtight container
  • Or you can can it (while still hot)

Serving suggestions:

Open faced sandwich with onion jam, goat cheese, walnuts and arugula


Crostini with burrata, onion jam, fig & ghost pepper salt

Thursday, September 22, 2011

Fall & Winter Gardening

One of the nice things about living in this area is that we have 3 distinct growing seasons. Evidently it is very Mediterranean...

Many people plant a summer garden, and then think they need to wait till spring to start their garden back up. Not true. One of the nicest things about fall and winter gardens is the relaxed pace.

In summer, you are constantly at war with your garden, and with mother nature. Literally by the time you pick your vegetables and bring them in the house, there is that much more already ready to be picked. It is frantic! You are always trying to out-speed your garden by canning, pickling and preserving. Plus there are bugs and other creatures to contend with, and weeds growing at the same pace as your veggies.

Yes, mother nature does have a sense of humor, and she IS laughing at you!

Fall and winter bring cooler temperatures, and with that a much easier pace of gardening. You can actually enjoy the process, and your garden.

So, what actually grows when it is cold, wet and all round icky? Lots! Here are some things I have had success with:

Kale:
I have only grown Tuscan kale. It is really yummy, you can harvest very young leaves to use fresh in salads or allow plants to mature and use as a cooked green. The larger leaves without the center rib can also be crisped in the oven for a yummy snack. Kale is especially good after a frost, and can be left in your summer garden as long as it is in a slightly cooler spot. It will bolt if too warm.


Cabbage:
Savoy cabbage - thats the way to go. It is one of the prettiest and tastiest cabbages. It is great braised, stuffed, or raw. What makes it better than any other cabbage is that it lacks that characteristic odor regular cabbage has when cooked.


Cauliflower:
The best variety I have found is snowball. The others I tried didn't look anything like what you get in the stores, the head wasn't compact and it tasted meh. The other trick that might have helped was that I grew it in the same box as my fava, so it was protected through the winter. The result, beautiful white, compact cauliflower!


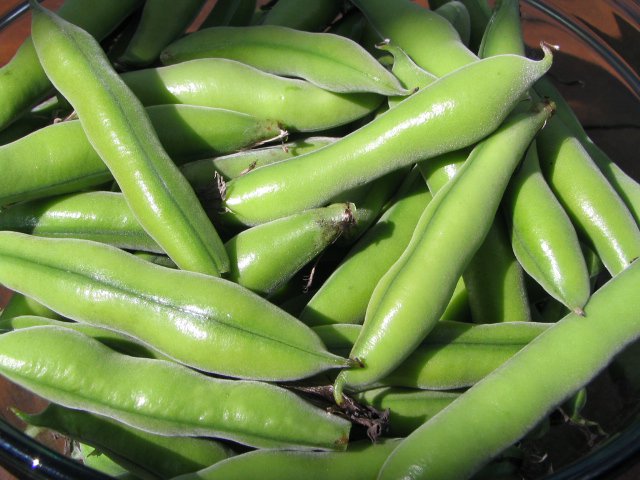
Fava: Great ground cover for the cold weather! The easiest thing to grow, don't bother with seedlings, just go to the local store, but the dehydrated beans, soak overnight, and plant straight in the ground! The blossoms have a wonderful fragrance too. Sure prepping it is a little work, what with peeling the pods, cooking and then peeling the beans, but it is so worth the effort!


Carrots: Again, another easy veggie! Plant the seeds directly in the ground. 2 things to make sure (very, very sure) - (1) Turn the soil really well where you plant carrots so they can grow easily. If there is too much resistance from the soil, you will get misshapen or very small carrots. (2) Thin your seedlings regularly so the carrots have room to grow.

Onions: Bunching onions, torpedo onions, yellow, white, or red onions. They all are really easy to grow. Best if you can prevent them from bolting, though the flowers are really good to eat too! The resulting onion bulbs are just as tasty, though a lot smaller.

Hopefully this gives you an idea of what you could plant in your garden over the next few months. When in doubt, just visit your local nursery and see what they have.

Happy gardening!


Wednesday, September 14, 2011

Fancy Brunch?

I sure do! It makes me feel like a socialite enjoying the weekend (never mind that I am generally the one making brunch...)

One of the easiest dishes, yet one that will wow fellow diners (IMHO) is fritata. The best part? It can be served at room temperature! So, you now get to eat with everyone.

Bring on the mimosas!

Herbed Frittata:
2 servings

Ingredients

* 4 eggs
* finely chopped green onions (2-3)
* finely chopped fresh herbs (any mix you like)
* 1 Tbsp. olive oil
* 1/4 cup shredded cheese (I used Gruyere)
* 1 medium potato, sliced thin, and cut into quarters (best not to use too starchy a potato, the red skin potatoes work well)
* 1/4 cup shelled fava beans or peas


Directions:

Fritata:
Heat broiler. Break eggs into medium bowl. Whisk together eggs, splash of milk, green onions, chopped herbs, and 1/4 teaspoon each salt and ground black pepper; set aside.

Heat olive oil in 12-inch broiler-proof skillet with flared sides over medium heat. Add egg mixture. Lift edges of egg mixture as it sets, allowing uncooked mixture to flow underneath. When edges begin to set (top is soft, but not runny), place eggs under broiler, 3 to 4 inches from heat. Cook 1 minute or just until set. Top with cheese; return to broiler just until cheese is melted.


Fava/Pea Salad:
Toss the fava with some thinly sliced green onions, herbs, olive oil, lemon juice, salt and pepper.

To serve cut fritata in wedges, top with salad. Enjoy!


Wednesday, August 31, 2011

Cooking with Thamma

Anupam's great Aunt and Uncle came to visit us.  True to usual Bengali style, they came with an appetite for good food and with family recipes to share.  I had a great week sharing with them all the lovely things I enjoy making, the vegetables in my garden, and learning all the family recipe secrets.  Lucky for you, I'm willing to share them too, but I'll start by talking a bit about how Bengali's eat and why I respect it so much.

Bengali food has a specific order in which it is enjoyed: first anything bitter, followed by posto, followed by daal, followed by fish, then meat and finally dessert.  Why do I respect this so much?  Well, for one, it starts with the healthiest (vegetables with bitterness contain quinine which is known to have many health benefits including preventing and fighting malaria) followed by other foods with important nutritional value such as daal (provides healthy protiens and vitamins) and fish (essential fatty acids) and ends with the less healthy dishes but which often give much satisfaction regardless of their nutritional value (meat and dessert).  Quantities are anyways small because a true Bengali feast has every course, but we finish the meal with the items we should eat the least of meaning we tend to eat less of it!  I love the subtleness with with Bengali tradition teaches the important of balance and satisfaction with food (it's okay to eat whatever we want, if we eat it in the right order and quantity). If only we would have followed that wisdom... ;)

Monday, August 29, 2011

Vegetable Dilemma

If you are anything like us, you probably spend a lot if your time planning what you are going to plant in your vegetable gardens. With 3 distinct growing seasons, there really is no time to rest!

You probably also take great pleasure in preparing dishes with your produce, telling everyone (that will listen) the dish was prepared with your backyard bounty. You have learned what to plant, when to plant it and so on, but how do you know when something is ready to pick?

Here is a general guide...


Asparagus: Begin harvesting when spears are 6-10 inches tall and before heads open. Snap them off at ground level; new spears will continue to grow. Stop when the average spear diameter is less than 1/4 inch.

Beans (snap): Pick before you can see the seeds bulging. They should snap easily into two. Check daily, as they will get tough quickly.

Beans (lima): Pick when well filled, but not over-mature.

Beets: You can harvest and eat the green tops that you thin out of the rows. Beets are somewhat a matter of preference when it comes to the right size. Most prefer a diameter of 1.5 to 2 inches, but they are ready any time after the shoulders come above the soil line.

Broccoli: We eat the unopened flower buds of broccoli, so check often as weather warms, and get them before they bloom (don't expect your heads to get to supermarket size). Harvest when the buds are about the size of a match head. Remove with a sharp knife; leave between 4 and 6 inches of stem.

Brussels Sprouts: Harvest when they are green, plump and firm (usually an inch or more in diameter). Harvest by twisting off or cutting the sprout from the stem.

Cabbage: Harvest cabbage when the head is firm and has reached adequate size, depending on the variety and growing conditions.

Cantaloupe (muskmelon): The color should change to beige and the fruit will "slip" from the stem easily. You may be able to notice a sweet smell when ripe.

Carrots: Depending on variety, pull when about 3/4 to 1-1/2 inches in diameter. The top of the carrot will show at the soil line; you can gauge when the diameter looks right for your variety. If the diameter looks good, chances are the length is fine too.

Cauliflower: As with broccoli, your cauliflower heads will probably not get to supermarket size. Harvest when the head looks full and while the curds of the head are still smooth.

Chard (Swiss): Harvest as leaves become large enough.

Collards (kale and mustard): Harvest young plants or lower leaves on older plants. Leaves should be young and tender. Taste improves with cool weather.

Corn: Pick after the silks become brown. The kernels should exude a milky substance when pricked.

Cucumber: Check daily and harvest early (if harvesting for pickling, even earlier). Timing and length will vary with variety. The fruits should be firm and smooth. Over-ripe cucumbers can be very bitter or pithy, even before they start to turn yellow.

Eggplant: Slightly immature fruits taste best. The fruits should be firm and shiny. Cut rather than pull from the plant.

Garlic: The garlic tops will fall over and begin to brown when the bulbs are ready. Dig gently, don't pull, and allow to dry before storing. Shake off dirt rather than washing.

Kohlrabi: For the best texture, harvest once the kohlrabi "bulb" is between two and three inches in diameter. Too much larger than that and it will be tough and woody.

Leeks: Harvest leeks when they are about 1 inch in diameter.

Lettuce (Head): Harvest once the head feels full and firm with a gentle squeeze. Hot weather will cause it to bolt or go to seed rather than filling out.

Lettuce (Leaf): Harvest the outer leaves once the plant has reached about 4 inches in height. Allow the younger, inner leaves to grow. Leaf lettuce can be harvested in this fashion for quite some time. If seed stalks begin to form, harvest the whole plant immediately and refrigerate.

Okra: Harvest frequently; figure about 3-4 days from flower to mature pod. Err on on the immature side--the pods get woody and tough as they get older. Remove old pods, even if you missed one too long, so they'll keep producing. Wear gloves and long sleeves when harvesting; okra has small spines (they look like hairs) that can make you itchy--even 'spineless' varieties have some.

Onions: Onions can be dug once at least half the tops have ripened and fallen over. Allow the onions to dry in the sun.

Onions (bunching): Dig before bulbing starts or before they become too thick (over 1/2 inch diameter).

Peas (English): The pea pods should look and feel full. Peas are sweeter if harvested before fully plumped. Peas really need to be tasted (raw) to determine if they are sweet enough.

Peas (edible pod): Harvest when the pods are fully developed, but before seeds are more than half size. (You'll need to develop a feel for this one.)

Peppers (bell, sweet): Fruit should be full size but still green, firm and crisp in texture. If red fruits are desired, leave on plant until red color develops.

Peppers (chile): Fresh fruit should be full size, shiny green to slightly red, firm and crisp in texture. Dry red fruit should be allowed to turn completely red and dry on plant.

Potatoes (sweet): before freezing weather. Cure under warm conditions (80°-85° F) for a week.

Pumpkins: Once the pumpkins have turned the expected color and the vines are starting to decline, they can be cut from their vines.

Radishes: Radishes mature quickly. Harvest as soon as they reach edible size. They will go quickly to seed.

Rhubarb: Delay harvest until second year after establishment. Established plantings (3 years) can be harvested for about 8 weeks. Harvest the largest stalks by grasping each stalk near the base and pulling slightly in one direction.

Rutabagas: The bulbs should be about 3 inches in diameter. Rutabagas can be mulched, left in the ground and dug up as needed. Cold weather improves their flavor.

Spinach: Spinach goes to seed quickly. Harvest by cutting at the soil line before you see a flower stalk beginning to shoot up. Or cut just below the crown for a one-time harvest.

Squash (Summer): Pick young and check often. The skins should be tender enough to poke your fingernail through.

Squash (Winter): Color is a good indicator of winter squash maturity. When the squash turns the color it is supposed to be, cut from the vine.

Tomatoes: For the best taste, harvest tomatoes when they are fully colored and slightly soft to the touch. Gently twist and pull from the vine. If your plant looks like it may be over-producing, you can also harvest some as they start to ripen and let them finish indoors. If you like fried green tomatoes, harvest as they reach full size (or just as the first color change begins, if you like them a bit less tart).

Turnips: The turnip shoulders should be about 1.5 to 3 inches in diameter at the soil line, when ready. Overripe turnips become woody.

Watermelons: The white spot on the bottom of the melon should change to yellow when ripe. Some people can hear a change in the sound made when the melon is thumped with a finger.


Wednesday, August 24, 2011

"Easy" Seville Orange Marmalade

For those of you that have never met a Seville orange, you truly do not understand what sour is.

Having inherited a prolific tree, after much agonizing over this little monster of an orange, trying to fertilize, and do all things humanly possible to make the fruit more edible, I finally realized this tree was a Seville orange tree! Seville orange, also known as bitter orange,
sour orange, and marmalade orange.

Acceptance finally set in that I would never win against nature, so the next step was to see how I could make lemonade out of the lemons I had been handed. Marmalade orange, huh?

Here I am 6 years later, finally ready to take on the challenge...

Seville Orange Marmalade

Ingredients:

2lbs, 8oz - Seville oranges
10oz - Lemons
4 pints - Water
4lbs - White granulated sugar

Directions:

Wash oranges & lemons well. Put the fruit in a large heavy bottomed saucepan and cover with the water. Put the lid on and bring to simmering point. Then turn the heat down very low simmer very gently for 3 hours until the fruit is soft. Allow to cool overnight in the poaching liquid.


Cut the cooled oranges and lemons in half and scoop out the flesh and pips into a separate saucepan. Add about a pint of the poaching juice and simmer gently for at least half an hour and then pour into a sieve lined with muslin set over a bowl.

Meanwhile discard the lemon peel and cut the halves of oranges in half again and remove the pith by scraping with the edge of a metal spoon. Be sure to get as much of the pith off as possible since the pith is what makes the fruit bitter. When this is done rinse the peel and cut into fine strips. (this is about the point you start to question why you thought this was a good idea in the first place)

By this stage the pulp liquid will have almost dripped through but it’s worth giving it an extra squeeze. Knot the muslin and pass two wooden spoons (juxtaposed) beneath the knots turn the spoons against each other which will squeeze out any remaining juice with little effort.

Add the pectin rich juice to the poaching liquid and check that you still have 4 pints of juice. Top it up with cold water if necessary.

Bring the peel gently to simmering point in the poaching liquid add the sugar and stir until it is completely dissolved. Taste the mixture – if it’s too tart for your taste add a little more sugar stirring again until it is completely dissolved. Then bring the marmalade to a rolling boil.

After 15 minutes test for a set. If the marmalade is not set bring back to a rolling boil and test every five minutes or so.

Using a ladle and a funnel pour into hot sterilized jars and seal immediately. Voila!


Monday, August 15, 2011

What are Your Favorite Summer Ingredients?

Tell us what your favorite summer ingredients are, and we'll incorporate them into our September menu!!!